- Microsoft ActiveSync
- Microsoft Visual Studio 05/08
- Windows Mobile 6 SDK
The setups for the files are pretty much straightforward so I guess it won’t be of much problem for you to get the installations done.
When everything is done, launch the Microsoft Visual Studio and select File -> New Project, expand Visual Basic and click Smart Device Project and then select Smart Device Project at the right portion of the windows. You may change the name if you wish to; press OK when everything is done.
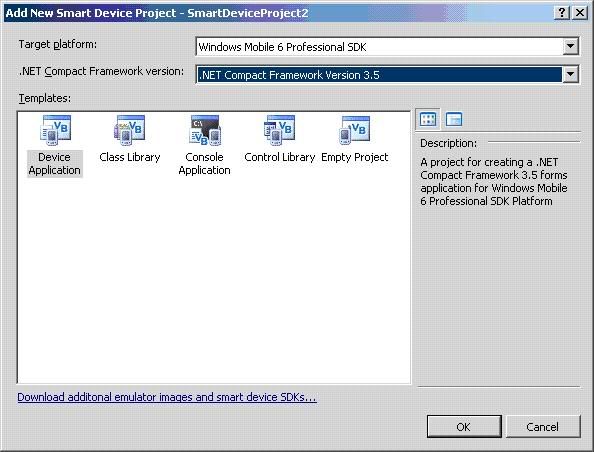
Next, a dialog similar to the picture below should appear, make sure that you’ve selected the right Target platform and .Net Framework version.(It’s not a necessity to have the same settings as what shown in the picture). Press OK when you’re done.

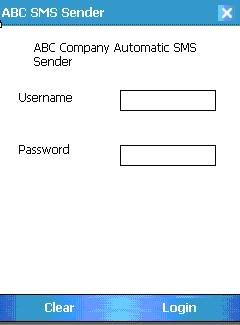
Design your form similar to the layout shown in the picture below. Again, it’s not a necessity to follow everything exactly. Just make sure that you have two textboxes for the username/password, a login button, and codes that validates the username/password combination.

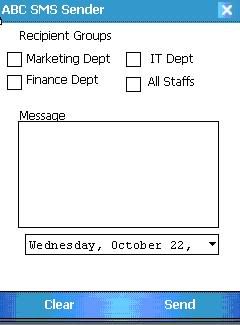
Similarly, design your form in accordance with the layout shown in the picture below. The recipient groups’ checkboxes allow you to specify your target recipient. Note that within the simulative environment recipient’s number can be any combination of numbers such as 02528335 or even 1234567. For instance, suppose you have the Marketing Dept and Finance Dept checkboxes ticked, the two departments have the number of 00000 and 00001 defined respectively. Upon the transmission of the SMS, the mobile phones having the number 00000 and 00001 will receive the SMS.
The piece of code that does the SMS sending to the emulator is as follows:
where
h = The number of the recipient. For example you can do retrieve the number from a textbox like txtRecipient.text
Dim VBMobileSMS As New SmsMessage(h, g)VBMobileSMS.Send()
Before that, you have to import an external library first(place this at the topmost of the program)
Imports Microsoft.WindowsMobile.PocketOutlook
Note : If you encounter an error stating that the library could not be found, go Projects -> Add Reference and select Microsoft.WindowsMobile.PocketOutlook under .NET

Once you’ve gotten the design/coding done, hit F5 once or click the green arrow-like button, a windows should appear, asking you to select an emulator to deploy for the program. Personally I prefer running my mobile programs using Windows Mobile 6 Professional Emulator, but of course ultimately the choice is still yours. (As far as I know the difference in the type of emulator chosen does not affect your programs in any way, except the appearance of course.) Most importantly, make sure that your cell emulator is running else the emulator would not load.
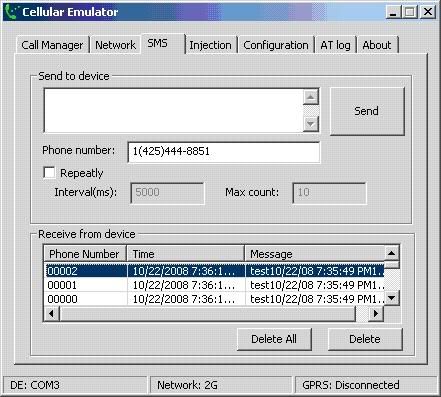
Next, a mobile emulator should appear and your program will be loaded into the emulator as well. Now try to send a simple SMS, you should be able to see the message you typed in the cell emulator, similar to the picture below.

If you encounter an error stating that the COM port is unavailable or similar, check the bottom left of your cell emulator program, you should be able to see which port your cell emulator is currently using. Now go back to the deployment of the mobile emulator select File -> Configure -> Peripherals, under
You can download the program here.
.png)


No comments:
Post a Comment