Thursday, April 15, 2010
-2o1o- ARP Poisoning
When i think of writing descriptive/procedural oriented articles like what I've done in the previous article, i cringe in horror; for a simple reason that they bore me easily when it comes to writing them. On the contrary, my blood pressure tends to mount upwards as an effect of the excitement I always get by just thinking how much fun and challenge I would get in the process of writing a conceptual based article like this. Note that this article is meant for educational purposes only, I am not responsible for any loss incurred or harm caused from the practice of the skills/techniques taught.
Imagine one day when you are seated in Starbucks with a cup of your favorite Espresso and laptop by your side, listening to a business plan (which you deem not viable) of a young local entrepreneur who decided to franchise his business overseas. Boredom strikes and you decided to logon to Friendster via the wireless network to perform some social networking activities, until he finally notices your show of disinterest and leaves in utter disappointment. The next moment some anonymous guy taps your shoulder from the back and says “Hey I have your Friendster account!”
Note : You might be wondering why i chose to use a less popular site Friendster over high popularity sites like Facebook, Hotmail, and Yahoo. This is because Friendster is by far the first well established site I’ve come across, without encryption implemented in its authentication system.
The Nature of Network
Before proceeding to the interesting part, let us first fortify our knowledge on how the network transmits packets and how the router route the packets from the source to the destination. For people who do not wish to read to understand the underlying concept, you are at liberty to skip reading everything until the section “Demonstration of ARP Poisoning Attack”.
Consider the following example, user A is a home computer user with three computers connected to a router (192.168.1.1/24). One day he picked up a web designing course and decided to make a homepage of himself and host it locally. When people ask user A for the address of his newly created homepage, he would give them his IP address or domain name and people would enter the IP address/domain name in their browser, and the browser would send a SYN packet to initiate the TCP 3-way handshake process.
Everything works smooth without flaw until this point, however problem arises when the packet reaches the user A's router. His router would not be able to reach the destination because the packet contains only WAN logical IP address for itself to reach the router; it does not tell where the router should send itself to. A simple workaround for this is to send the packet to all computers connected to the router, but this apparently is not the most ideal solution, as it floods the whole network with unnecessary traffic and eventually causes traffic congestion or even Denial of Service (DoS) attack within the network.
Port Forwarding
This is where the port forwarding makes its debut in this article. Port forwarding is a NAT extension whereby the packets are directed to the intended destination by referring to the port mapping table. Of course, before everything takes place, the user has to map the port to its own logical address in order for the router to understand where to direct the packets to. Continuing from the above example, in order for the router to know how to route traffics coming to port 80 to user A's computer, it's a must for user A to map the port to his computer's IP address. After user A has done with the mapping, the router would, in essence, forward every traffic coming to port 80 to his IP address, which we assume as192.168.1.13. This also explains why a router can only have one device mapped to one port. The router however, still does not know how to reach the recipient simply by just knowing the address.
Note: A router uses NAT (Network Address Translation) to translate addresses initiated locally whereas the NAT extension “port forwarding” is used to translate address initiated outside the local network. In this article I chose to use port forwarding to explain the example because I think readers would prefer to read port forwarding over NAT.
Address Resolution Protocol
Now please allow me to introduce you the ARP (Address Resolution Protocol). ARP is a protocol used to determine the physical address (also known as MAC address) when only the logical address(IP address) is known. When a device wishes to locate another device on the same network, it would send an ARP request to every device with the message "Who has this IP Address?” and it expects the correspondent device to send back an ARP reply with the message "I have this IP address and this is my MAC address". Continuing from the above example again, the router would send every devices on the local network, says "Who has the IP Address 192.168.1.13?" and the user A's computer would send back an ARP reply "I have the IP address 192.168.1.13 and my MAC address is 00-52-FF-07-82-93". The router then sends the packet to user A’s computer and the connection ends gracefully when both parties have finished sending data and decide to terminate the session.
ARP Poisoning
Finally it comes to the wonderful part, suppose that user B, who is someone with malicious intent, happens to be living near user A and has access to his wireless network. He connects to the network, tells the router by sending an ARP reply indicating that he is 192.168.1.13(user A's IP address) and does the same to user A, indicating that he is the router (192.168.1.1). Interestingly, the router unfortunately does not know how to verify the authenticity of the ARP reply. It would only blindly thinks that user B is 192.168.1.13 and forward every packet that which is intended for 192.168.1.13 to user B. Likewise, the user A would also think that user B is the router and it would also forward every outbound packet to user B. With the possession of these packets, user B can view the contents and even launch a Man in the Middle Attack (MITM Attack) against user A.
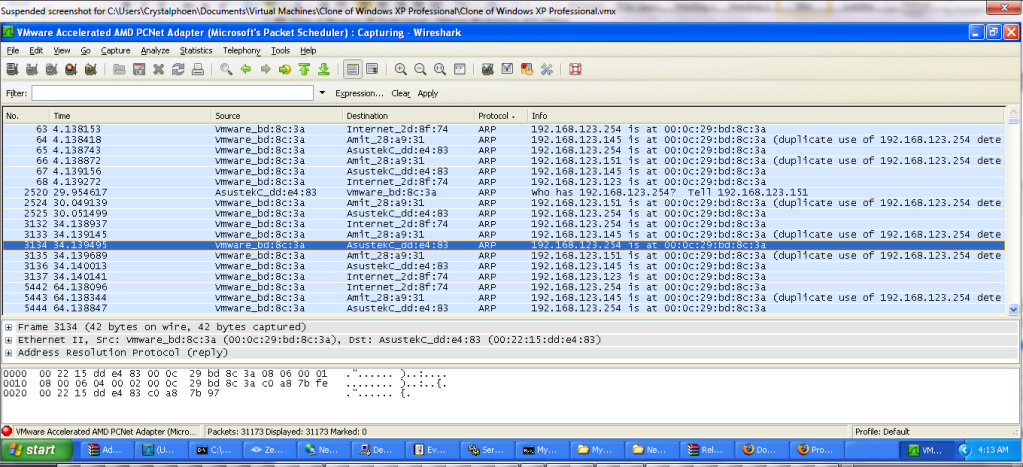
(Screenshot depicts the network activity when ARP spoofing/poisoning takes place where 192.168.123.145,192.168.123.151,192.168.123.254 are the victims and 192.168.123.123 with the MAC address 00:0c:29:bd:8c:3a is the attacker)
User B simply sends the original packets to user A and it would not raise suspicion for user A because he is essentially getting the data that he wants (unless it has been modified).
Demonstration of ARP Poisoning Attack
An ARP poisoning attack will be demonstrated below using Cain & Abel, which can be downloaded from http://www.oxid.it/cain.html
1. Activate the sniffer
2. Start ARP Poisoning
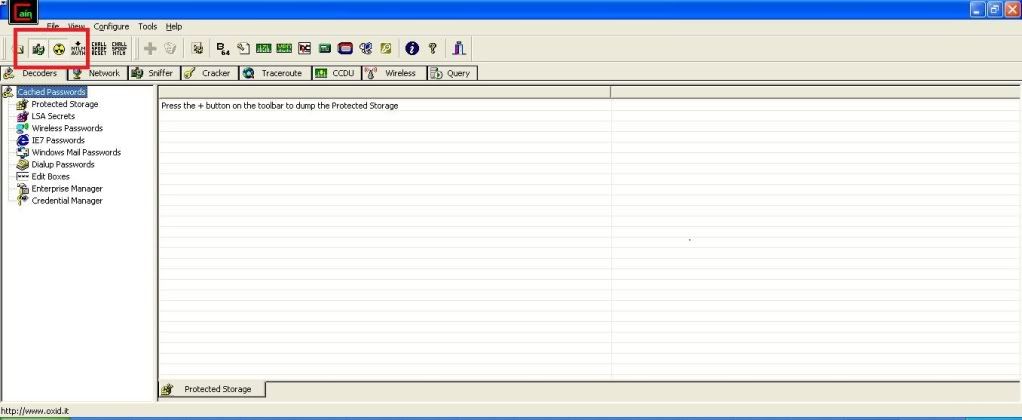
3. Click Sniffer tab and click the plus sign to scan for all MAC Addresses in the same subnet.
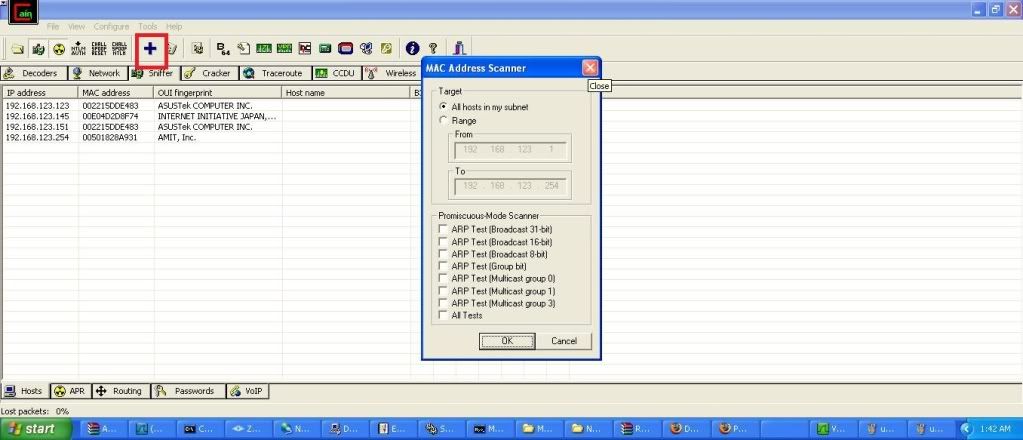
4. Click ARP tab and click the plus sign to add host to be ARP poisoned. Now we want to intercept the connection between the computer 192.168.123.151 and the router, which is 192.168.123.254. So we would select 192.168.123.151 and 192.168.123.254 from the list.
you should get something similar to the screenshot below.
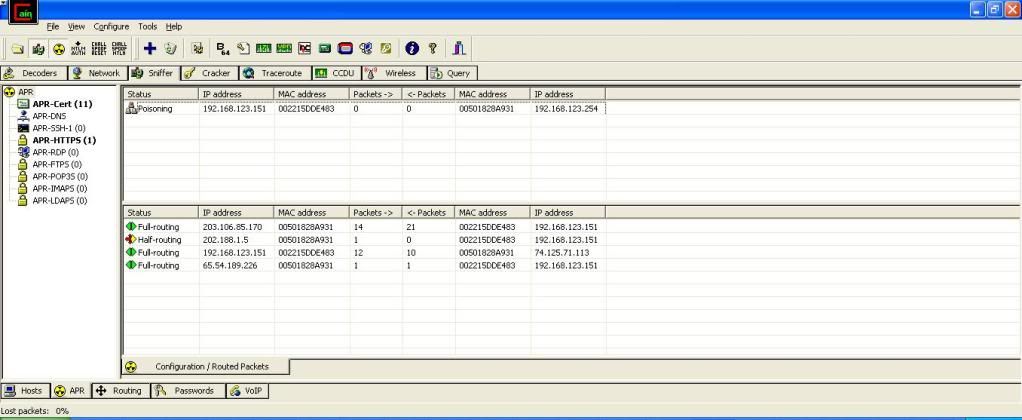
5. On another computer, I innocently enter my username and password and log into the Friendster website.
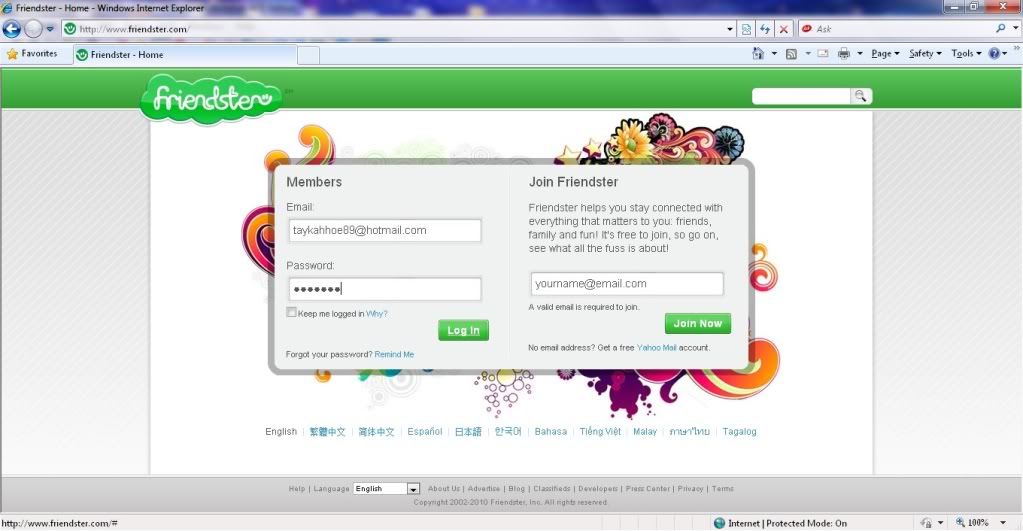
6. Click the passwords tab and select HTML, and there you see the username and password. taykahhoe89@hotmail.com and KLSDJ9S, mission accomplished.
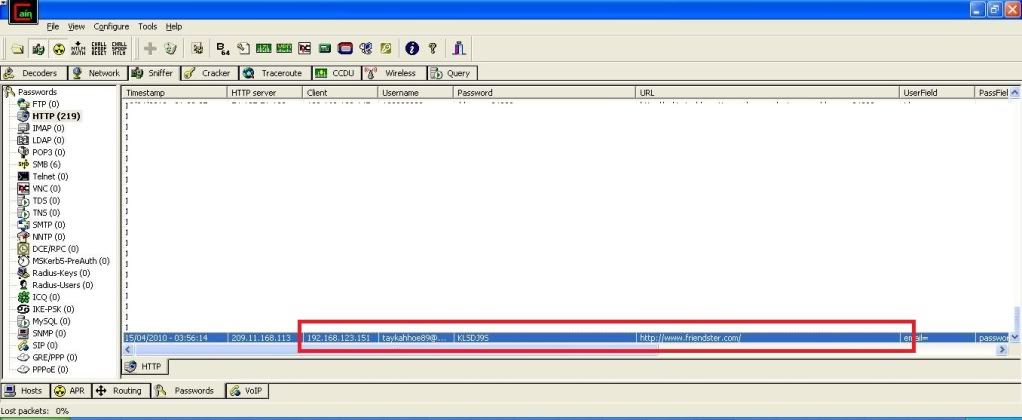
Note: For wireless adapters, turn off the promiscuous mode if you fail to detect any MAC addresses. This should fix your problem, but you won’t be able to spoof your MAC address with promiscuous mode turned off.
DotAAssistant + AudiSim + cPrOxCMS
Most of the time when I run my IDE, the image in my mind would turn monochromic; it happens especially when I look into the list of projects I developed over the past 3 years. At that particular instant I would rekindle the sweet past I had with each and every of the programs I developed, and my heart would go filled with guilt because I feel that it’s a sin to keep programs with superior level of built-in intelligence but not touching them. So I decided to release them to the public, and do bear in mind that you are free to improve or use any part of my releases below.
Here comes the most favorable moment, I hereby present you three of my wonderful releases:
-2o1o- DotA Assistant (2009)
DA and the Fuzzy Logic
DA is a program written based on the fuzzy logic, it operates by the means of what the human perceives as true. In a fuzzy logic program, things are evaluated based on the human's reasoning, which is approximate, rather than precise.
For instance, in this program I define a player as "absent" if the DA fails to locate the RGB of players after 8 scans. However, the concept of absence may differ between each individual. Another programmer who develops a similar program may see the phenomenon “absence” as player who goes disappear from minimap for longer than 10 seconds. Each of us uses a different way of defining the absence of a player. Despite the fact some people who may think our statements are incorrect; we could arguably say that we are both correct, essentially. This in turn, implies that fuzzy logic relies on the mathematical model of the vagueness phenomenon, on the basis of degree of truth.
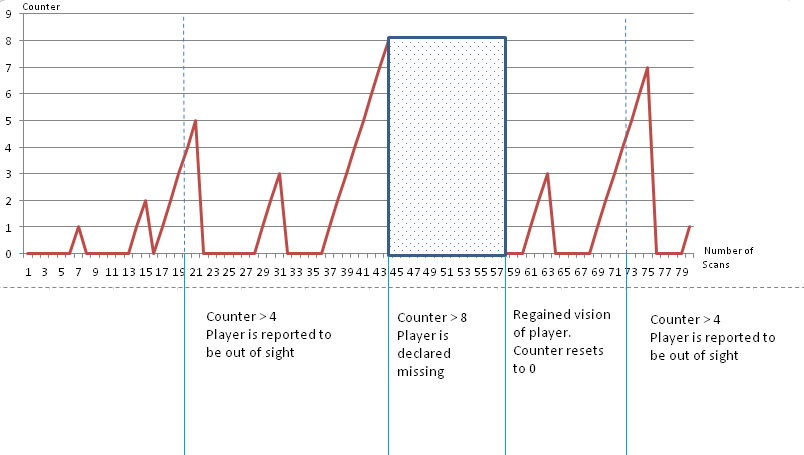
The picture below illustrates one of the possible outcomes in the process of detecting the player’s changes of state (ea: from absent to present), with the following conditions:
-Missing counter increases by one per scan if DA fails to detect one of the possible combinations of RGB for the player in the minimap
-Missing counter resets back to 0 whenever DA detects one of the possible combinations of RGB for the player in the minimap
-DA reports the player as out of sight as soon as the missing counter for the player reaches more than 4
-DA declares the player as missing as soon as the missing counter for the player reaches more than 8
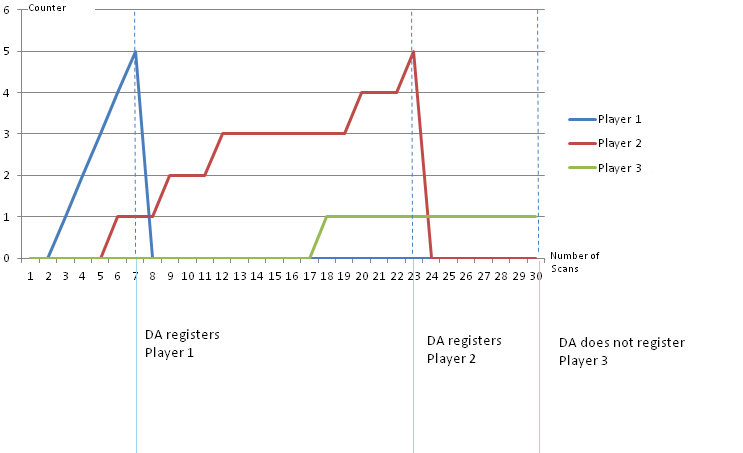
The picture below illustrates one of the possible outcomes in the process of determining the existence of a player
We assume that
-Player 1 = Player with strong RGB = Player with color which is NOT susceptible for DA to be misled another color for it (ea: red,blue,white)
-Player 2 = Player with weak RGB = Player with color which is susceptible for DA to be misled another color for it (ea: pink and teal)
-Player 1 and 2 exists in the game
-Player 3 does not exist in the game(does not exist in minimap)
with the following conditions:
-Registration counter increases by one whenever DA detects one of the possible combinations of RGB for the player
-DA registers the player as soon as the registration counter reaches more than 5
Classes in DA
DA contains 13 classes. 4 of the classes were used solely for testing purpose, 7 contains algorithms used for various functions, 1 class contains predefined sets of variable for character recognition, and the last class contains Main, used for executing DA. The brief descriptions of significant classes in DA are as follows:
CharRecognition
Contains the method definition for the size, pattern points and precedence of the characters. Also contains the logic for character scanner and logic..
CharRecognitionHandler (there's one faux paus committed, the CharRecognition which contains the method definition should be named CharRecognitionHandler whereas the CharRecognitionHandler which contains the predefinition of variable should be named CharRecognition)
Contains only the predefined sets of variable for character recognition
DBHandler
Contains various methods involving the interaction with DA database
DotAAssistant
Contains fuzzy logic to determine what the DA should do if the player changes its state, ea: from absent to present
DotALogic
Contains mathematical logic involving formulas used to calculate attributes of a player
FileOperator
Contains various methods involving file I/O operations
ItemRecognition (Incomplete)
Contains the methods used to retrieve RGB codes of different items to form a combination of pattern points
Player
Contains the definition for the player object
PlayerHandler
Contains various methods which handle the changes of player state
AudiSim (2009)
AudiSim is a simulator for the game Audition Online, which was written in Java. It serves as a training tool for the user to improve by a larger margin. Do bear in mind that in practice the effect may vary, depending on the individual attributes.
I’ve also written a replay viewer for AudiSim, a program which has the ability to load the AudiSim replay files. In order for the replay viewer to load the replay file, you would need to insert the directory of the replay file in the command line (by right clicking run.bat -> edit).
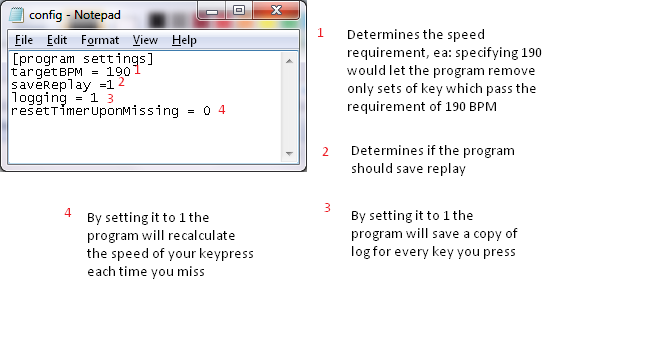
The user configuration file(config.ini)
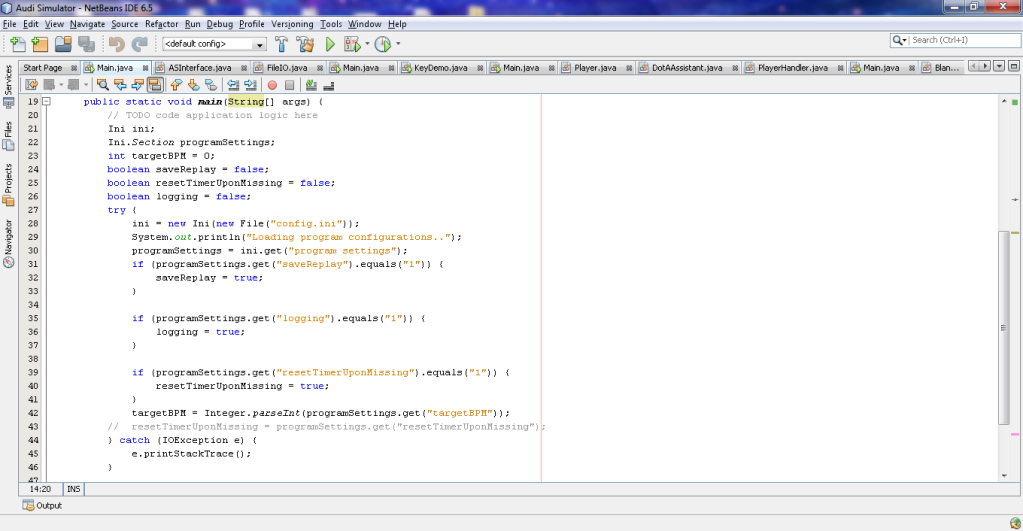
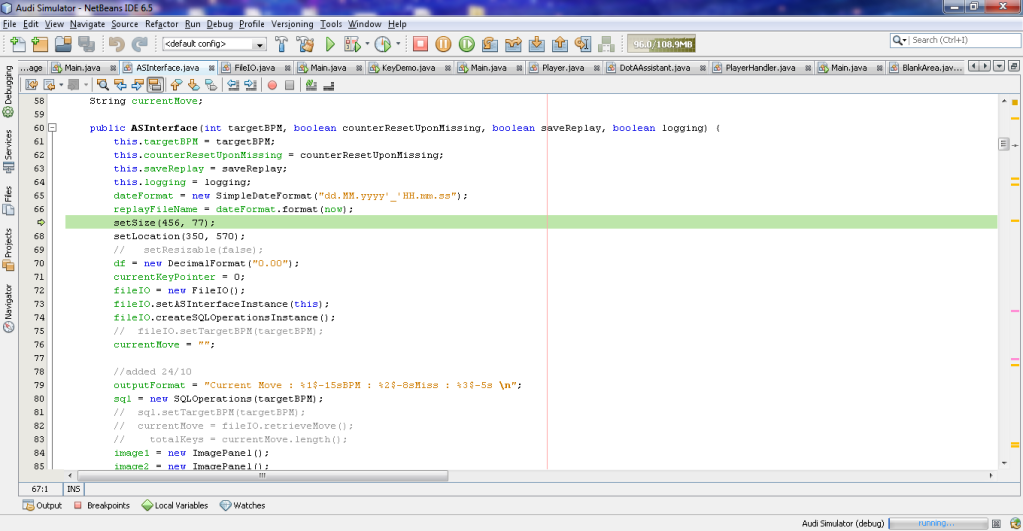
AudiSim first retrieves the user configuration from the file passed to the ini constructor (Main.java) . It thereafter passes the retrieved user configuration to the AudiSim Interface constructor.
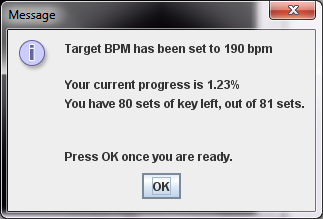
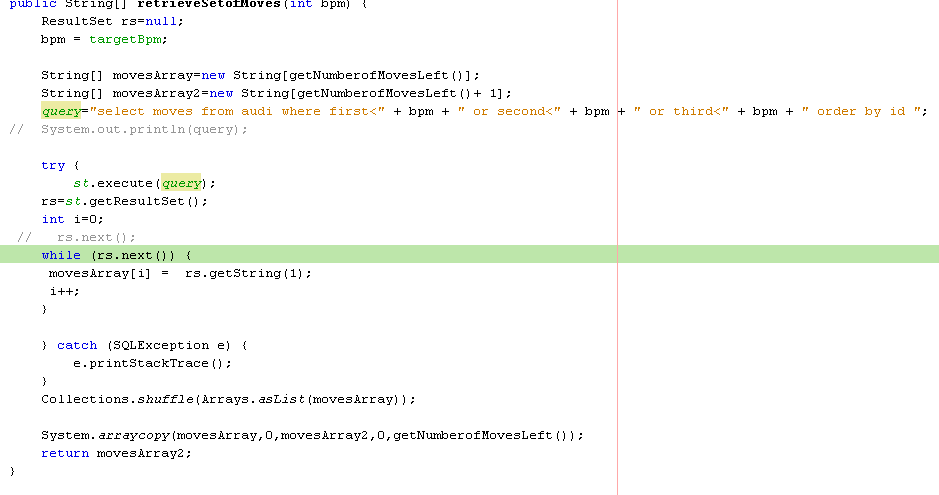
Next, AudiSim instantiates/initializes the necessary objects and variables for the GUI to be loaded. At this point the database handler(DBHandler) begins to come into the picture by executing a query on the AudiSim database to retrieve the number of moves left for the user to successfully complete the training session.
AudiSim then passes the value to the moveArray for the program to allocate the space needed to store the moves. After that, AudiSim explicitly invoke the method retrieveSetofMoves(int bpm) in DBHandler to retrieve the set of keys left, fills the moveArray up with the set of keys stored in the result set and DBHandler terminates the loop after it reaches the last set of key. Next, AudiSim shuffles the key in order for them to appear in randomized order (if you do not want the key to be shuffled, change the shuffle = true to false).
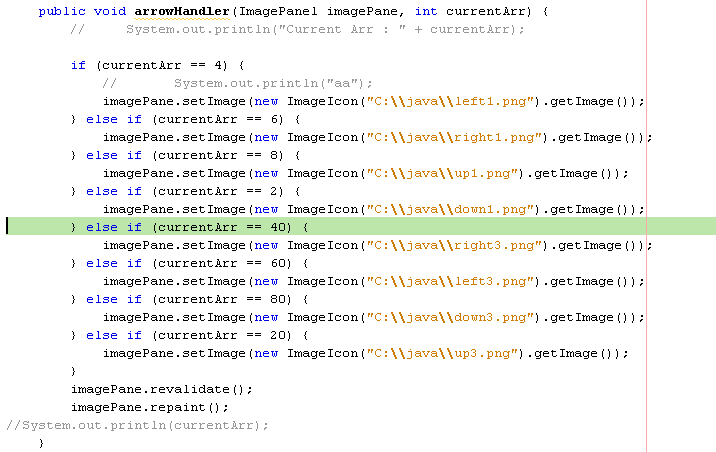
After shuffling the collection of moves, AudiSim retrieves the first set of move in the collection and assigns a copy of current move to the log data buffer (var : dataBuffer). AudiSim identifies the length of the current move to ascertain the number of image panel needs to be repainted. Each of the keys goes through the arrow handler procedure, the segment where the chance handler kicks in and assigns chance flag to the selected keys.
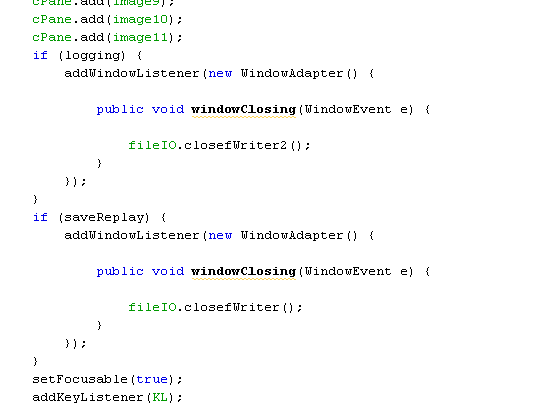
Lastly, AudiSim creates the key listener to listen for user input for appropriate changes to be made on the image panel when user presses an arrow key. AudiSim also creates file handles and output stream associated with the replay and log file if the user specifies the session to be saved and logged.
cPrOxCMS (2008)
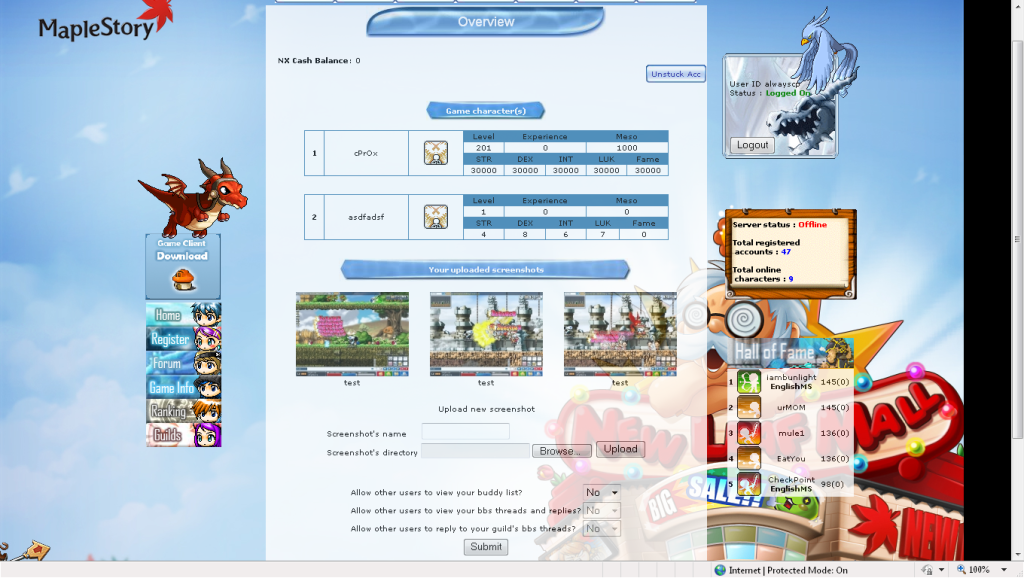
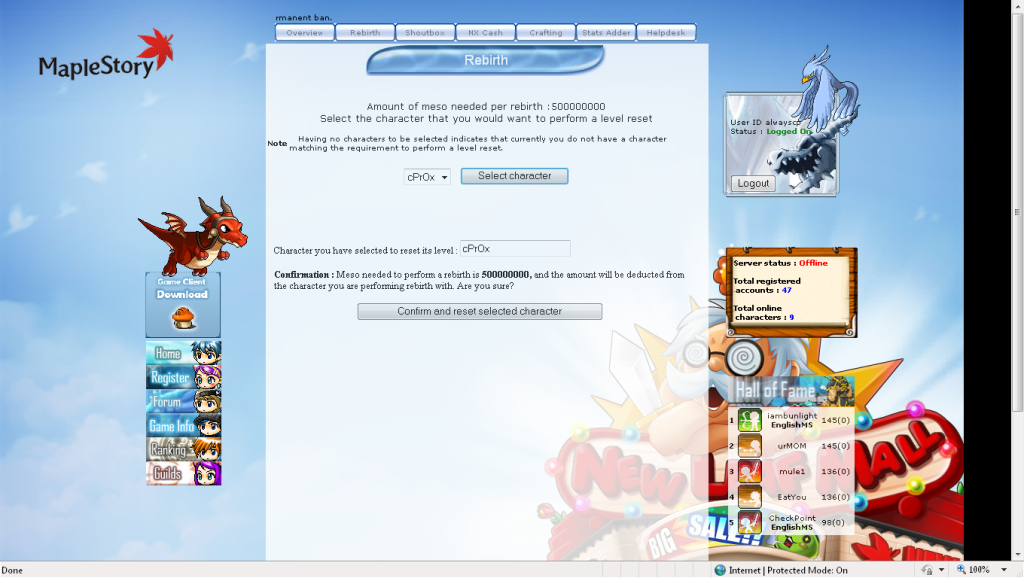
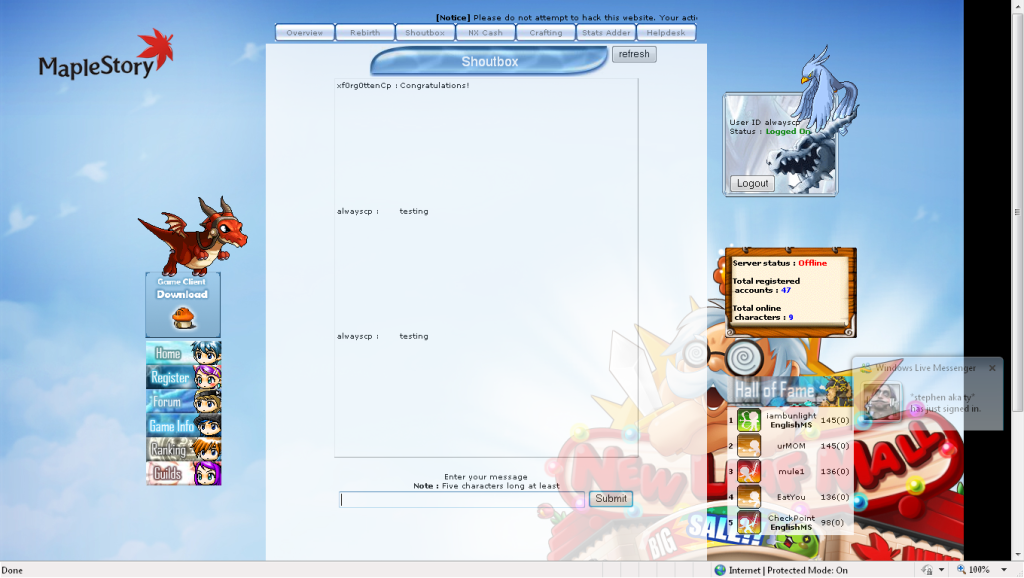
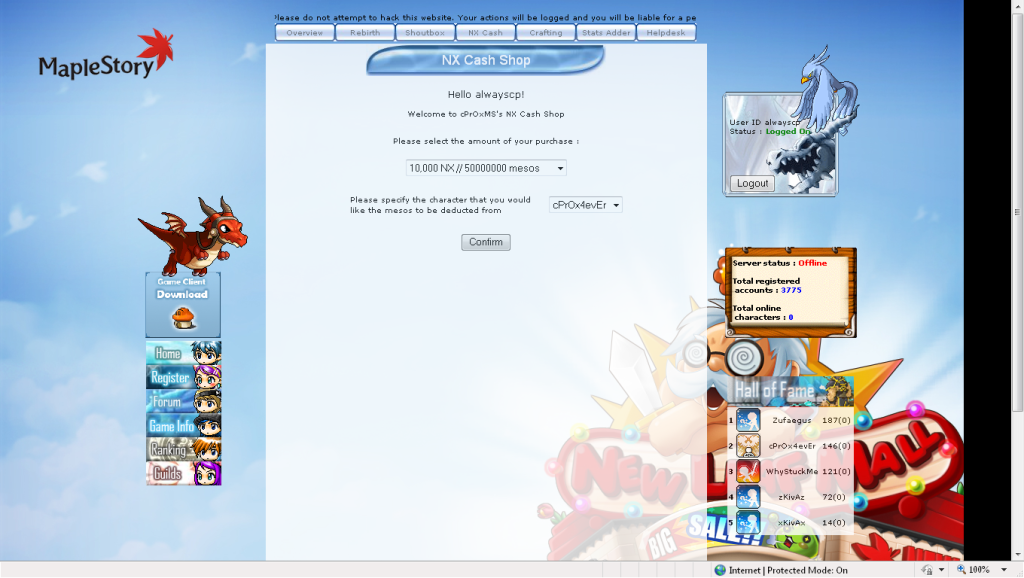
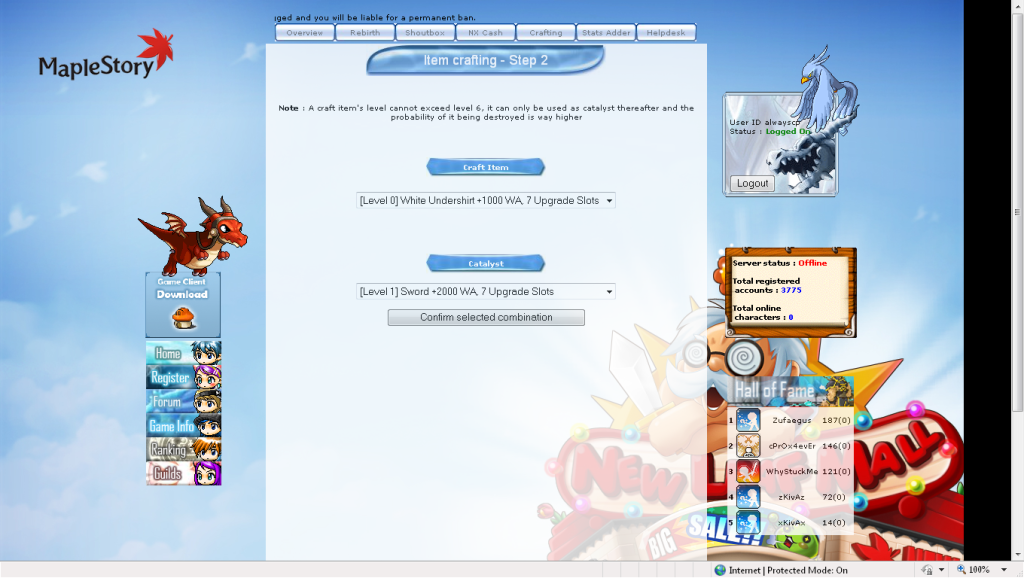
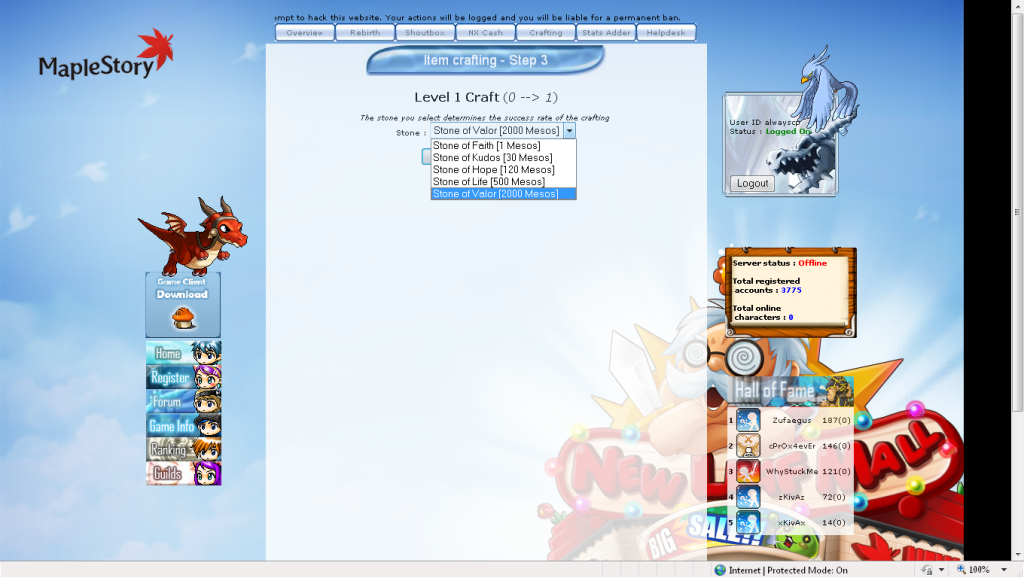
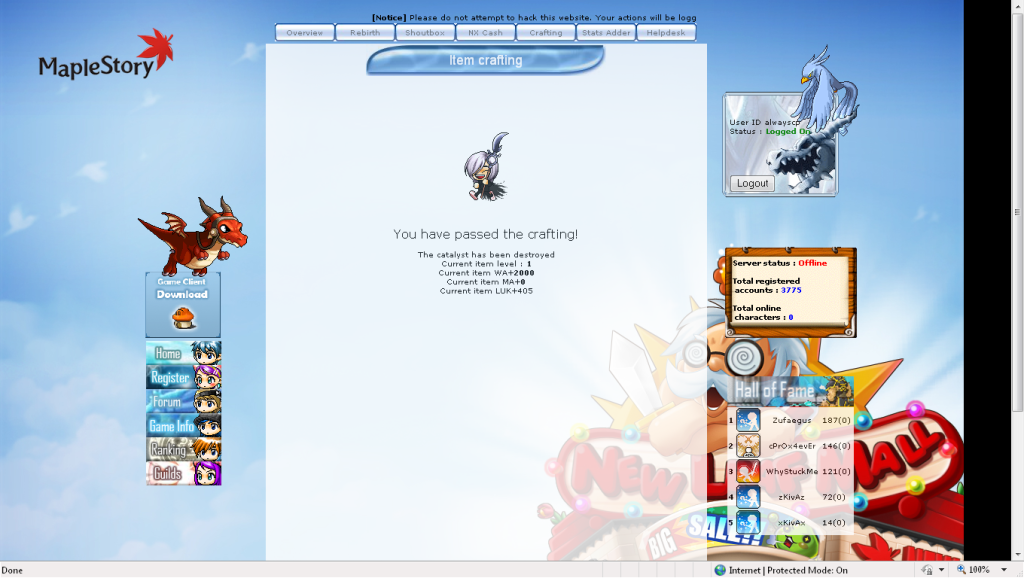
cPrOxCMS is a web content management system for MapleStory private server written fully in PHP. It serves as a framework for the players to access information and several features in the server. The core feature of cPrOxCMS which makes it distinctive from all other available MapleStory CMS around is the crafting system, which I would delve deeper into it in the latter part of this post(don't expect much though, as I will only be posting screenshots of it).
I won’t be explaining much about this release because if I were to do so for these 70 files of PHP code, I believe I’ll lose my sanity before I even finish writing the first half of the files. Hence, I will only be listing out the features for this release. Pardon my inability to fully enlist the features of the CMS because my memory decided to fail me at this point of time.
Warning: You are strongly advisable to place the news_insert.php, news_insertion.php and a copy of config.php in another hidden directory in your webserver otherwise anyone who accesses your web could easily load the news insertion page and create a big havoc in the news section.
Features
-Sanitizing forms/queries input to prevent SQL Injection attacks
-Cookie checking to prevent cookie modification
-Auto tracing unrecognized user inputs
-Nation
-Shoutbox
-Ranking
-Crafting system
-Allows user to customize permissions for viewing buddy and guild list
-Allows user to view guild members/BBS threads and posts
-Allows user to view buddy list
-Allows user to upload screenshots
-Allows user to perform character reset
-Allow user to add stats
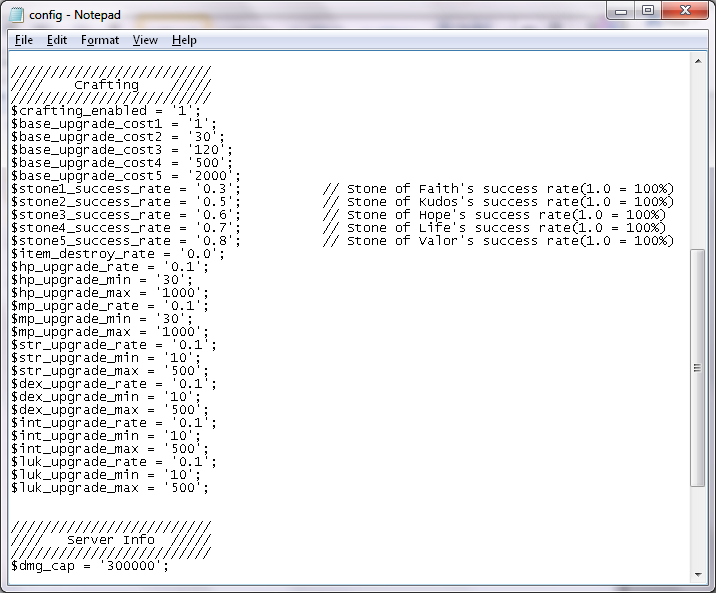
-Fully customizable crafting rate
Download links